Running Vorpal on a Windows HPC Cluster
Note
Prior to running VSim with Windows HPC Cluster tools, please ensure that VSim is properly installed on your Windows Cluster. (See VSim Installation Guide)
Setting up the Simulation Directory
The following is an example of how to run an example VSim simulation on a Windows Cluster. In this example, the UNC Share Path that is set up on all nodes in the Cluster including the headnode is:
\\hpcheadnode\scratch
This path should be replaced by the path to your shared drive,
whatever it might be. Paths in UNC (Universal Naming Convention)
should be used, so \\machine_name\name_of_share\directory instead of
S:\directory.
To start, we create a new simulation in a directory on the shared drive. To do this, run VSimComposer on the headnode, which should be installed on the shared drive as Fig. 88 shows.
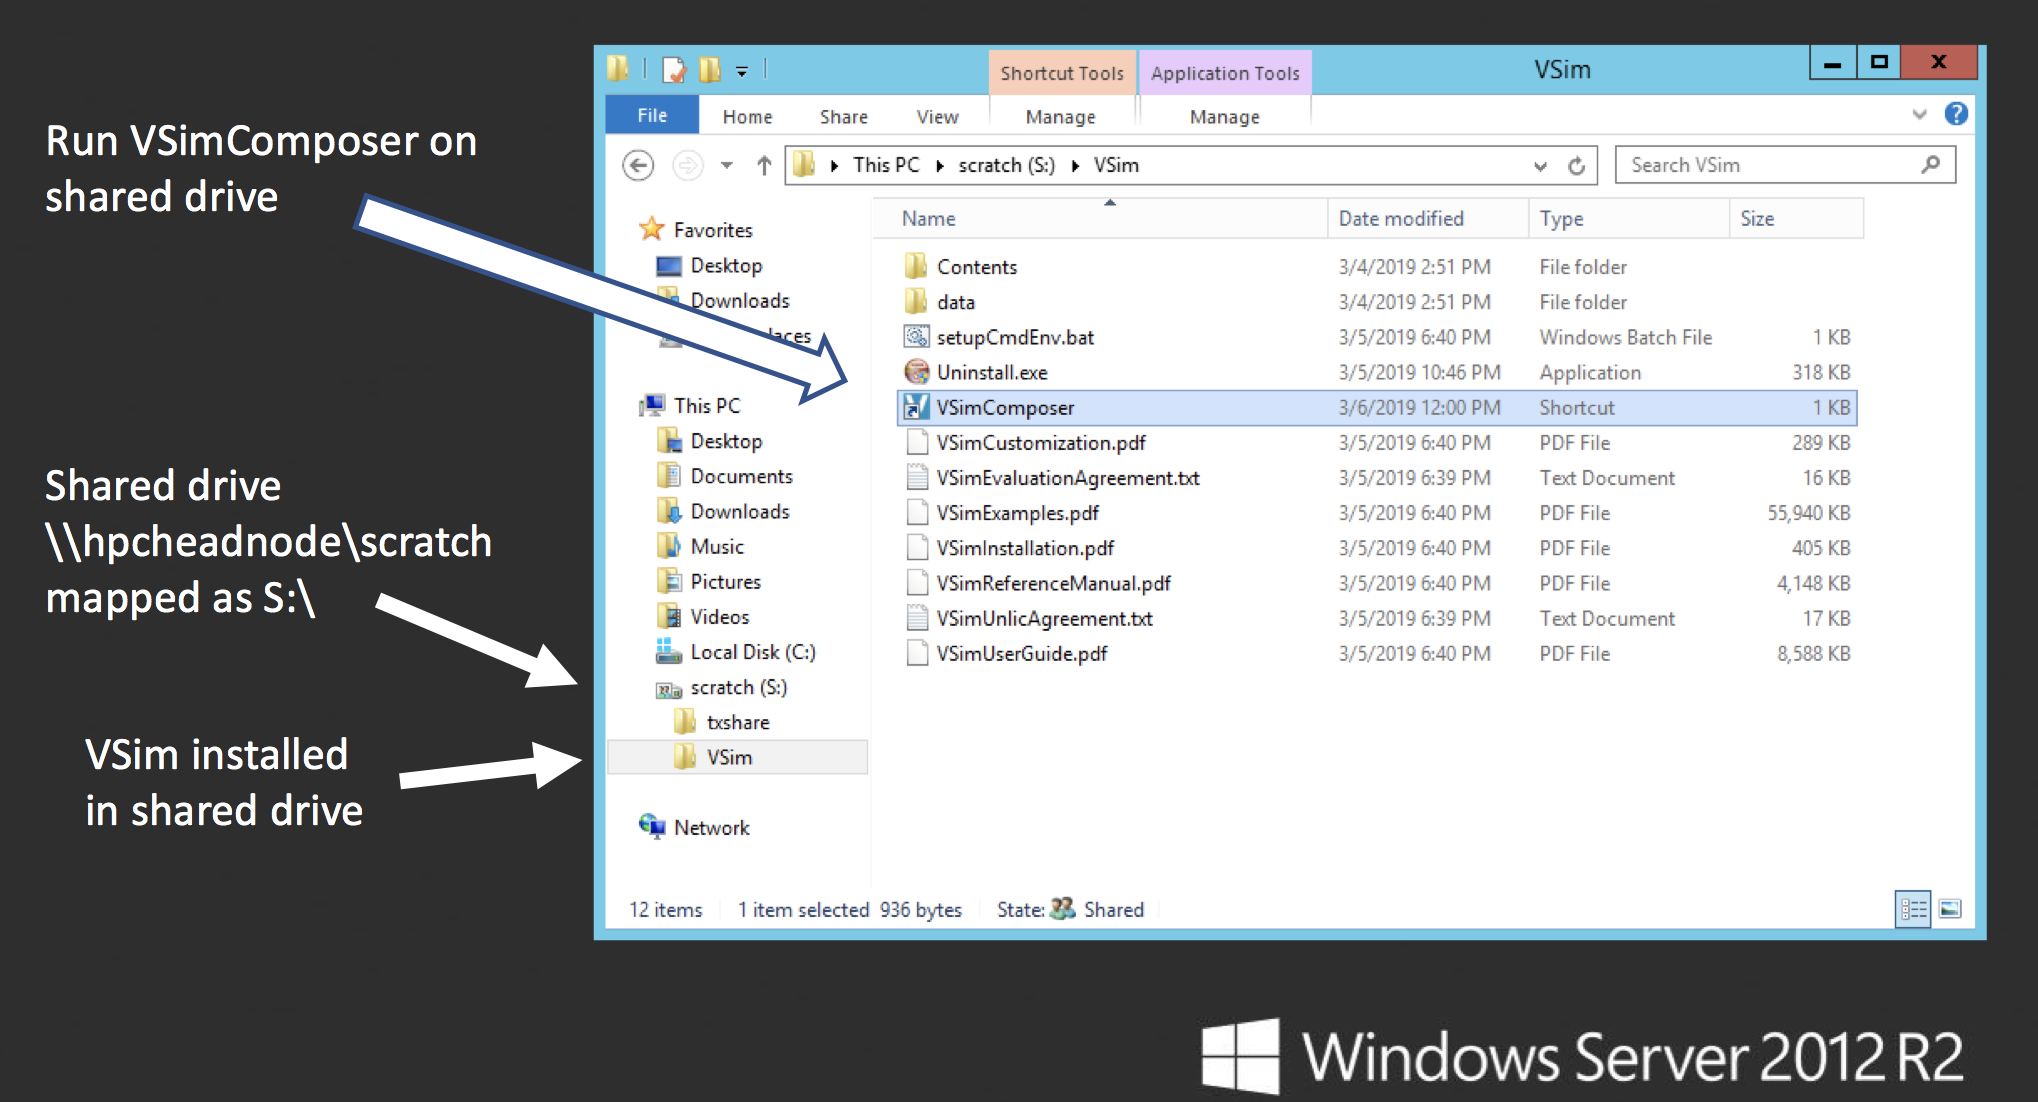
Fig. 88 VSim must be installed in the shared drive to run Vorpal on a Windows Cluster.
In VSimComposer, follow these actions:
Select the New → From Example… menu item in the File menu.
In the resulting Examples window expand the VSim for Basic Physics option.
Expand the Basic Examples option.
Select Parallel Plate Capacitor and press the Choose button.
Select the text in the Directory field and replace it with the shared drive UNC path. See Fig. 89 below.

Fig. 89 Choose the shared drive in the Directory field so that the subsequent New Folder is on that drive.
Continue with:
Select the New Folder button and type in parPlateCapacitor for the name. See Fig. 90 below.
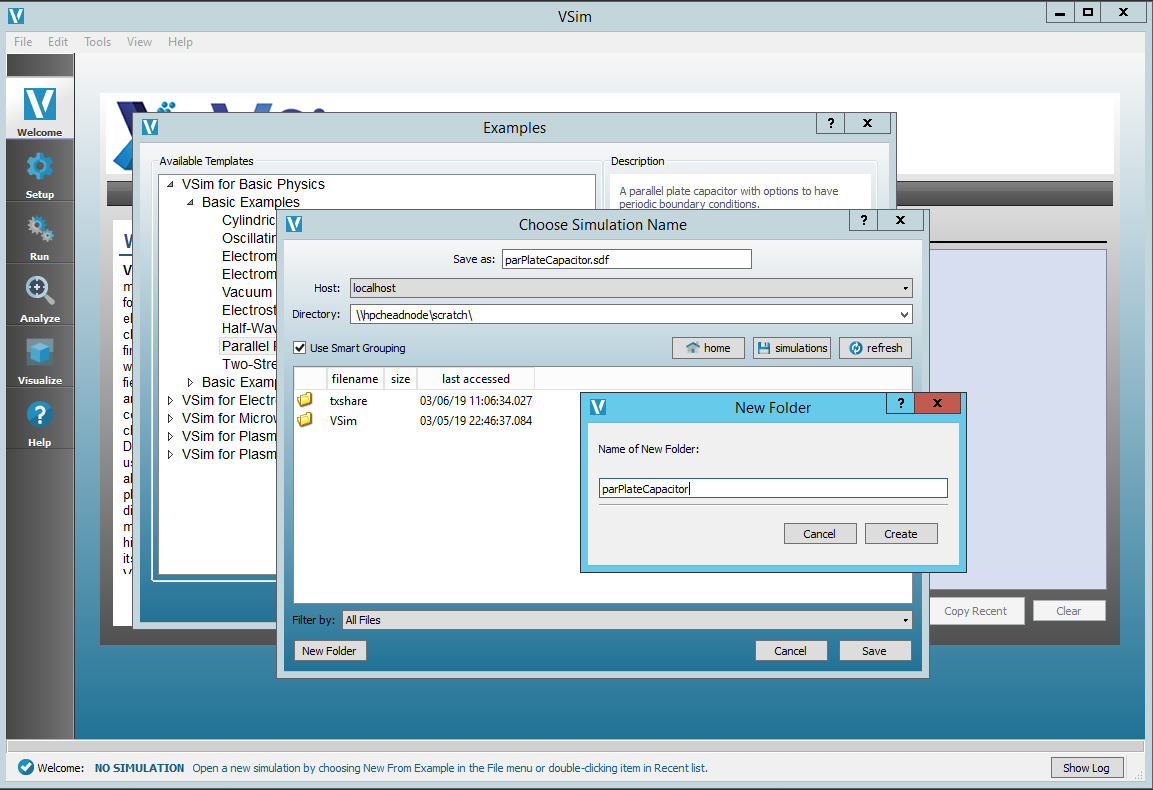
Fig. 90 Choose the name of the containing directory of your new simulation.
Now:
Click the Create button in the New Folder dialog.
Click the Save button in the Choose Simulation Name dialog.
At this point, you would normally change the setup to suit your simulation needs and possibly run it locally to check if you are on the right track, but for now, just exit VSimComposer.
You should now have a simulation directory in your share drive and be able to see it in Windows Explorer. See Fig. 91

Fig. 91 The simulation directory needs to be on the shared drive to run a simulation on a Windows Cluster.
Create a New Cluster Job
Jobs can be started from the command line and from the Cluster Manager tool. We will show how to create and submit a job from the Cluster Manager interface and leave it to the user to follow the Microsoft documentation on how to save the Job XML and run subsequent jobs from the command line.
Start the Cluster Manager tool usually located in
C:Program FilesMicrosoft HPC Pack 2012BinHpcClusterManager.exe
This should present with a window as shown in Fig. 92
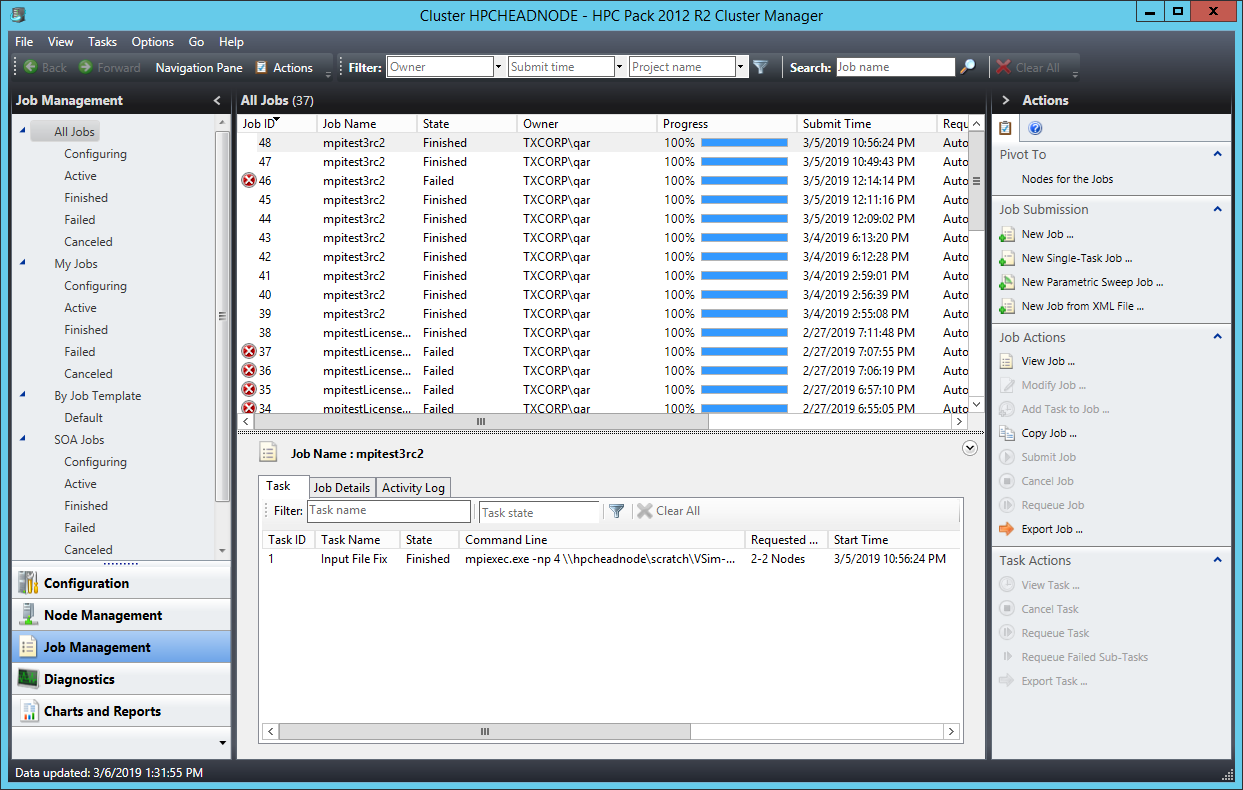
Fig. 92 The Microsoft HPC Pack Cluster Manager tool used to create and submit jobs to the cluster.
In the Cluster Manager, complete the following steps:
Select the Job Management tab in the lower left part of the window.
In the right Actions pane click New job…. This will bring up a New Job dialog
In the New Job dialog, type a name in the Job name field as shown in Fig. 93
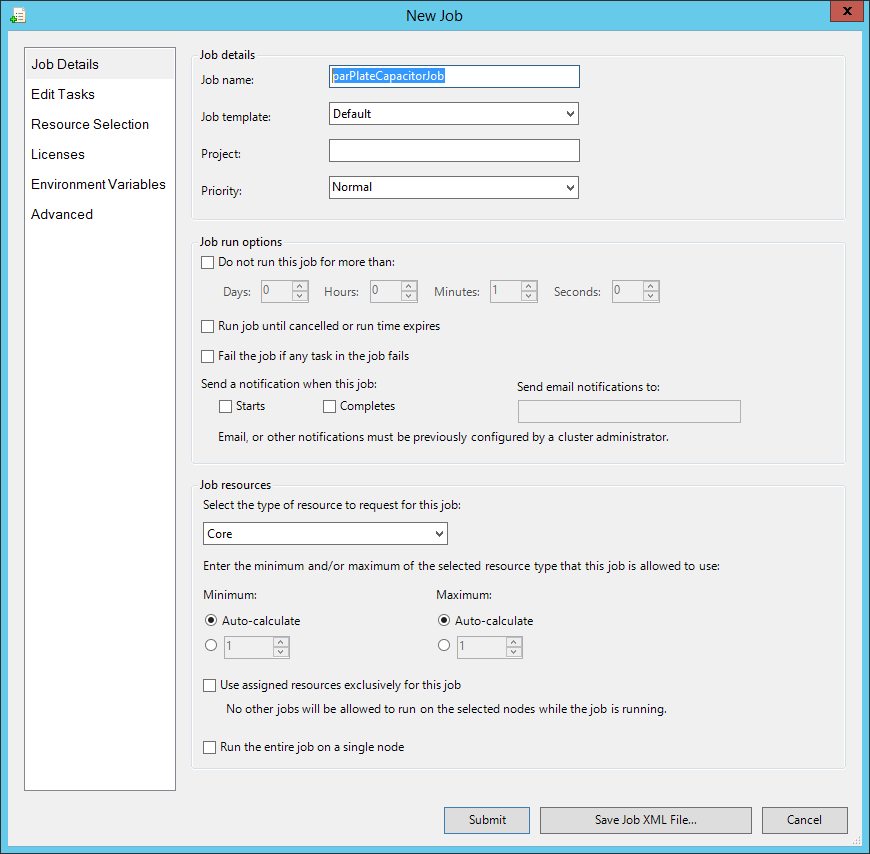
Fig. 93 The Cluster Manager New Job dialog is a wizard to help create and submit a job.
Continue with:
Select the Edit Tasks item in the left menu.
Click the Add button as shown in Fig. 94
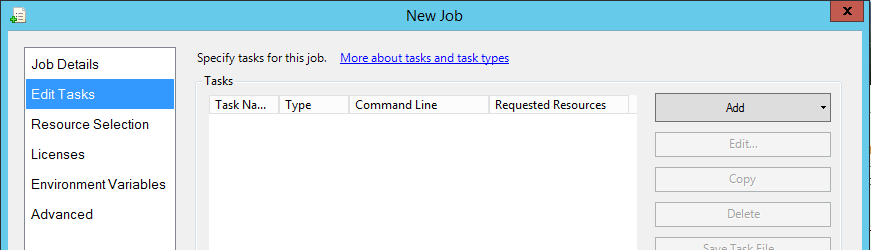
Fig. 94 Adding a task in the Cluster Manager New Job dialog.
Edit the task details by:
Edit the Task name field if desired.
Enter the command for running vorpal via MPI into the Command line field. Here you need the full path. to the vorpal executable and input file for your simulation. All the normal vorpal command-line arguments apply.
The Working directory field is required to be the simulation directory that we set up above.
The Standard output and Standard error fields are optional, but make it handy to organize the output.
Finally, select the number of nodes you would like to run on. The “-np 4” argument along with the Minimum 2 value says that we would like to run 4 MPI processes across 2 nodes.
The job Task Details dialog is shown in Fig. 95
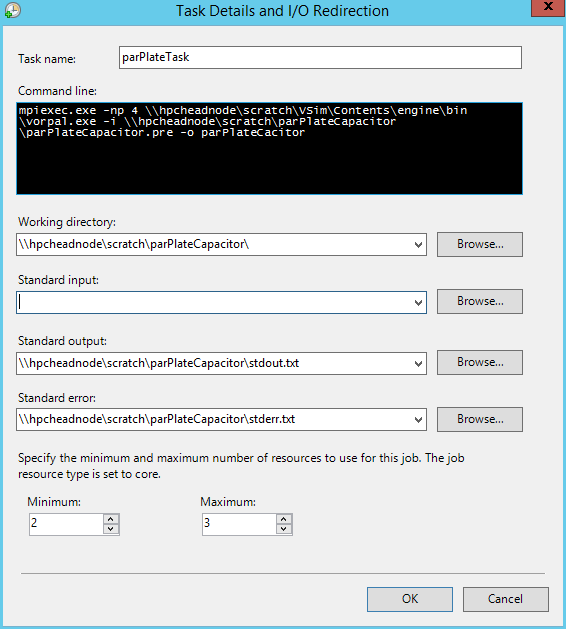
Fig. 95 Creating parameters for the task in the Cluster Manager New Job dialog.
Once the job task details are set, we need to do one last set of steps:
Select the task defined above.
Click Environment Variables in the Task Properites list. Then click the … button to the right of the line. The is highlighted in Fig. 96.
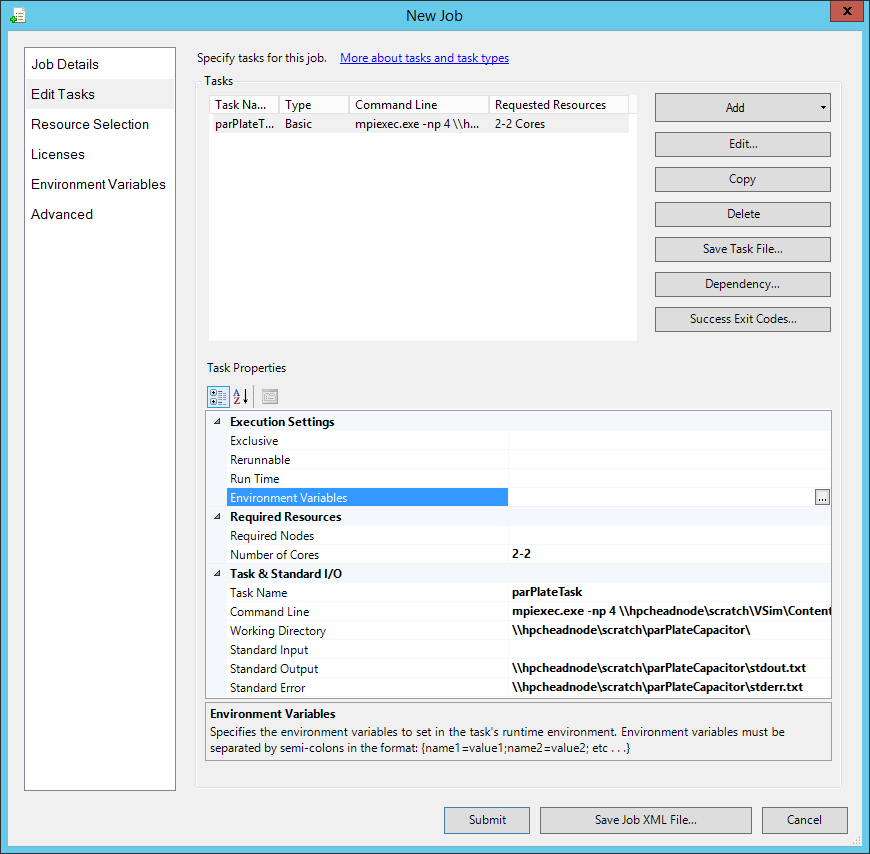
Fig. 96 Editing Job Properies for the task in the Cluster Manager New Job dialog.
In the Environment Variables dialog (Fig. 97),
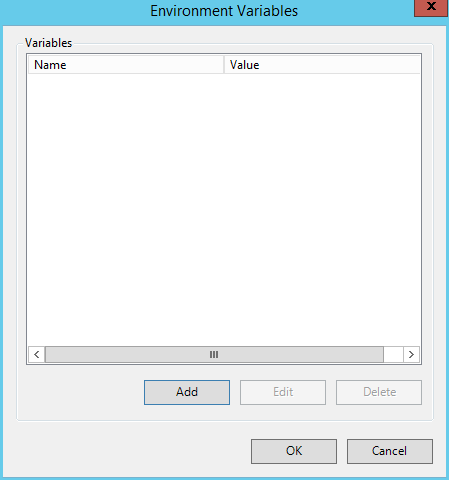
Fig. 97 Environment Variables dialog for the task allows user to see and add variables.
click the Add button. This will bring up the Add Environment Variable dialog (see Fig. 98).
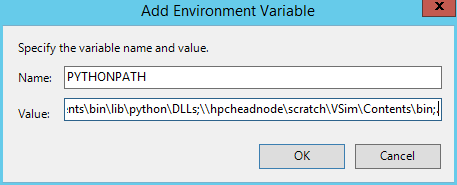
Fig. 98 Add Environment Variables dialog for the task to add PYTHONPATH.
In this dialog, enter PYTHONPATH for the Name and the following for Value: \\hpcheadnode\scratch\VSim\Contents\engine\share\scripts;\\hpcheadnode\scratch\VSim\Contents\engine\lib\site-packages;\\hpcheadnode\scratch\VSim\Contents\engine\lib;\\hpcheadnode\scratch\VSim\Contents\bin\lib\site-packages;\\hpcheadnode\scratch\VSim\Contents\bin\lib\python\lib;\\hpcheadnode\scratch\VSim\Contents\bin\lib\python\DLLs;\\hpcheadnode\scratch\VSim\Contents\bin;.
You will want to replace the value of the UNC Share Path
(\\hpcheadnode\scratch) with your own UNC Share Path in
the PYTHONPATH line. The PYTHONPATH variable is required
for all vorpal simulations to run, but other variables
such as SIM_DATA_PATH may be needed for a few select simulations.