Tools/VSimComposer Menu (Settings/Preferences)
On Windows / Linux
The Tools menu provides access to global settings for VSimComposer. The Tools menu contains the Settings selection.
Select Settings from the Tools menu to access the Application Settings window. See Fig. 26.
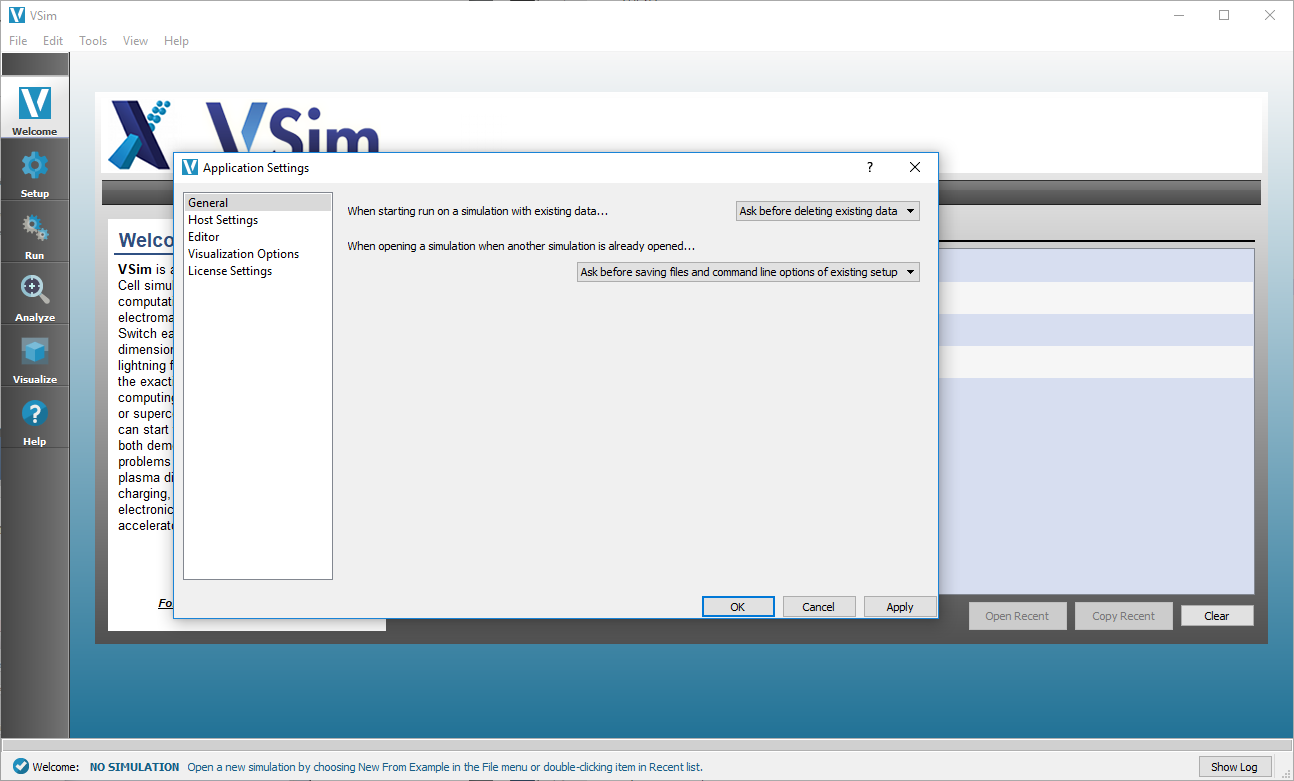
Fig. 26 Select Settings from the Tools menu
On Mac
The VSimComposer menu provides access to global settings for VSimComposer. The VSimComposer menu contains the Preferences selection.
Select Preferences from the VSimComposer menu to access the Application Settings window. See Fig. 27.
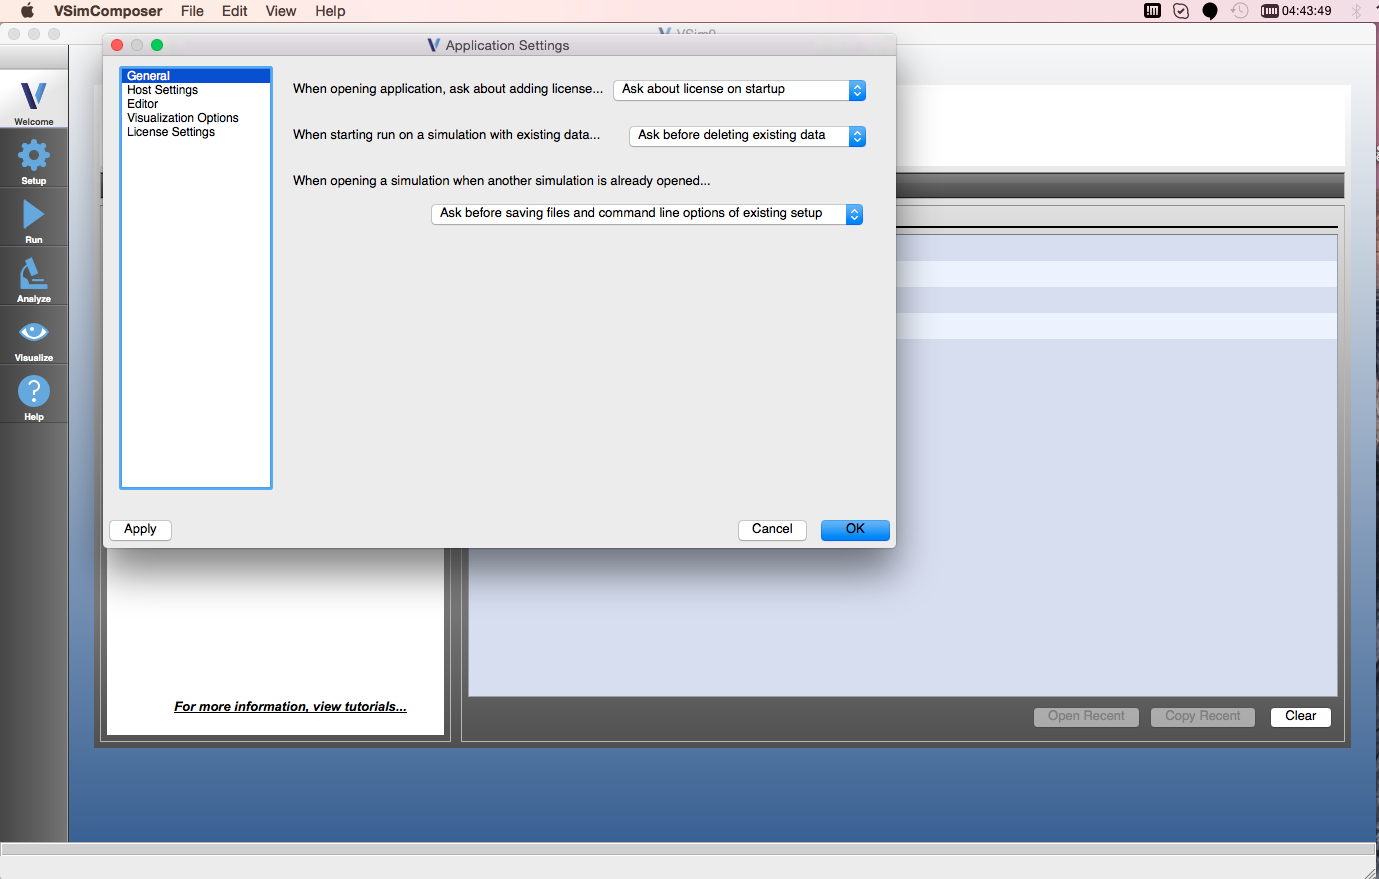
Fig. 27 Select Preferences from the VSimComposer menu
General
General application settings set the default behavior for the VSimComposer file, directory, and other actions. See Fig. 28.
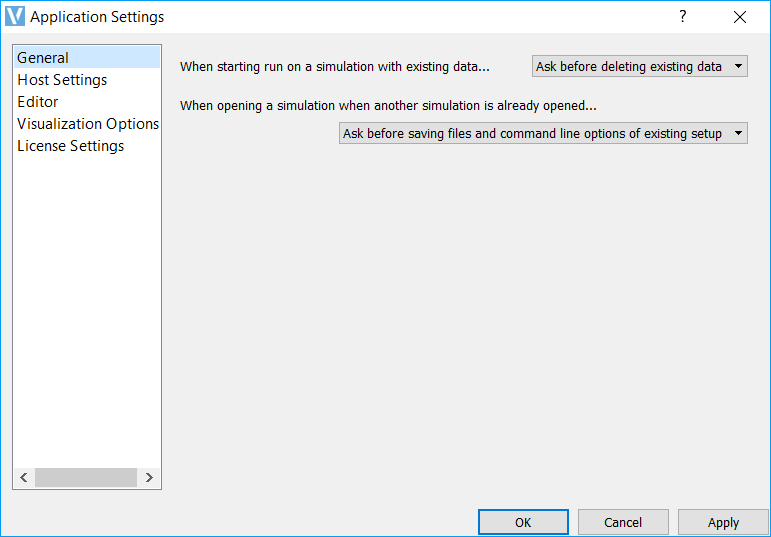
Fig. 28 General Application Settings
When starting run on a simulation with existing data, the default setting that VSimComposer will use when starting a simulation that already contains data is Ask before deleting existing data. If you know that you will always want to create fresh data for each run, use the pulldown menu to set the default to Always delete existing data. If you know that you will always want to run on the data already available, use the pulldown menu to set the default to Never delete existing data. See Fig. 29.
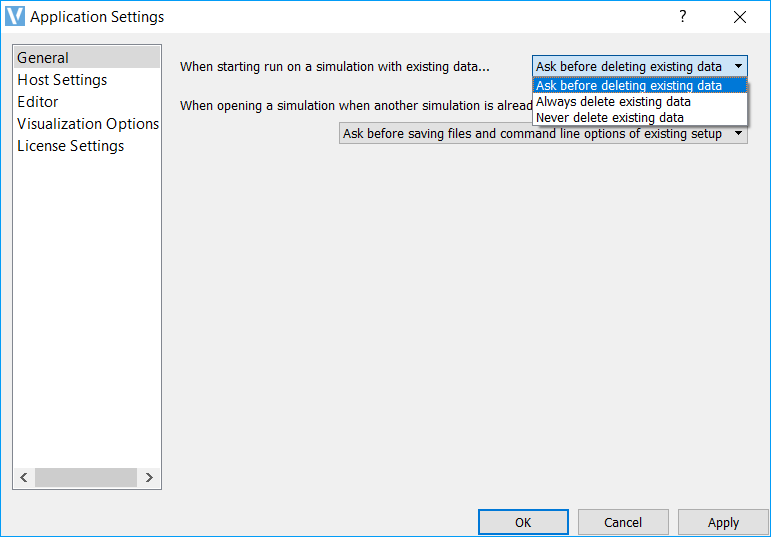
Fig. 29 Application Setting When Starting Run on a Simulation with Existing Data
When opening a simulation when another simulation is already opened, the default setting that VSimComposer will use is Ask before saving files and command line options of existing setup. If you know that you will always want to save the simulation, this can be switched to Always save files and command line options of existing setup. If you know that you will never want to save the simulation, this can be switched to Never save files and command line options of existing setup.
Host Settings
The Host Settings section allows you to specify what machine to run on, the paths to your installation directory and workspace directory, and your preferences for serial or parallel simulations.
By default, you will be running on your localhost machine with the default installation directory and a preferred run method of serial.
General
Currently, VSim only allows for running simulations on the localhost. See Fig. 30.
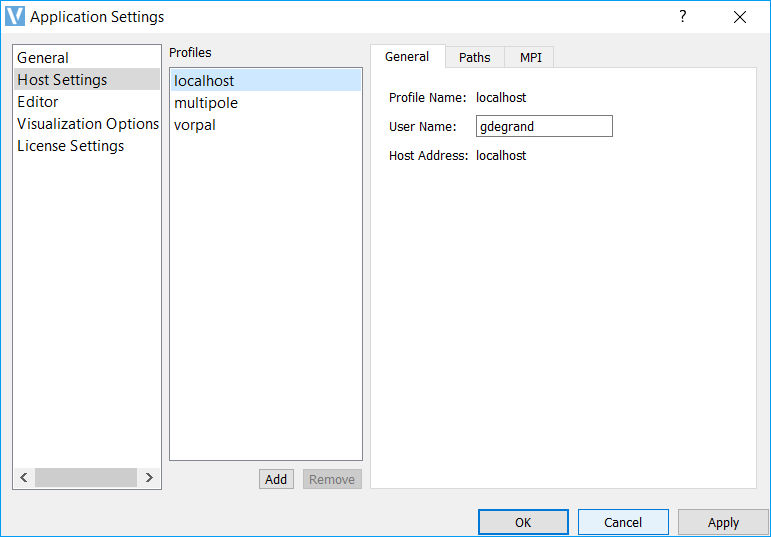
Fig. 30 Application Settings Host General Control Menu
Paths
- Simulations directory
is the default directory for your runs.
- Macros directory
houses the macros to be used in your runs.
- Analyzers directory
houses the analyzers to be used in your runs.
- Temporary directory
In some cases is necessary to set the environment variable TMPDIR (or TEMP on Windows) when executing vorpal. For example, on MAC when running in parallel and one gets an error “bind() failed on error Address already in use”, then setting the TMPDIR to a shorter string can solve the issue.
See Fig. 31.
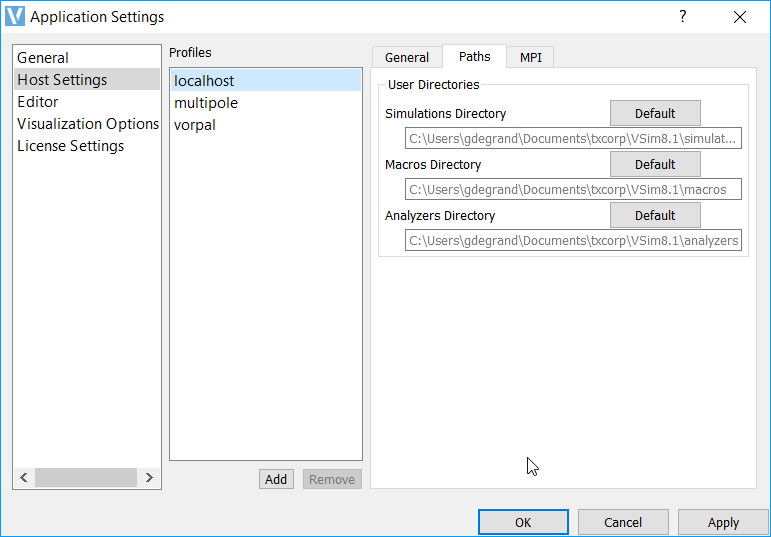
Fig. 31 Application Settings Host Paths Menu
MPI
Preferred run method is the VSim serial engine (vorpalser) by default. If you have a multi-core system capable of parallel processing and a license activation file that is good on multiple cores, you can set the default to parallel instead of serial by clicking on the Preferred Run Method drop down menu and selecting parallel.
Cores on machine shows the number of available cores for the current system that VSimComposer detects.
- Preferred number of cores
is the field in which you may enter a new value and change the number of cores that will run simulations. This is helpful when you would like to run simulations using fewer processors than the number of cores for which your software is licensed, or perhaps want to try load balancing using more processes than you have cores. When the value in the Preferred Number of Cores field is set to something other than the last saved value, VSimComposer places an asterisk in front of the field label so that you are aware that you have changed the value and may wish to save the new value.
Host File is where you can specify a file that contains the host nodes that you want to run on. This is useful if you have a large number of nodes, but need to run on a specific subset of them. For a description of how to create a hostfile see Running Vorpal with mpiexec Using a Hostfile.
See Fig. 32.
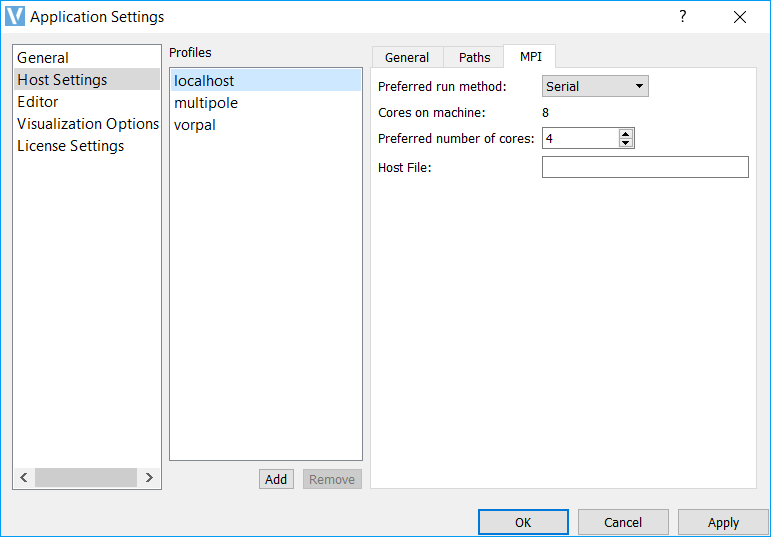
Fig. 32 Application Settings Host MPI Control Menu
Editor
The editor tab contains default settings for font size and a few other Setup tab options. These are editable to the users desired settings.
- Files with Fixed-width Font
Extensions refers to the file extensions that will obtain the following font and text size.
Font is where you can select the desired font.
Size is where you choose the desired text size.
- All Other Files
Font is where you select the desired font.
Size is where you choose the desired text size.
Tabstop Width is the number of spaces that are inserted when the tab key is pressed.
Color Style is where you select one of the choices for the color style of the text editor, including a white background, medium colored background, and dark background, with varying font colors.
Open files in “Parameter” editor by default opens the file showing the editable parameters and an image overview (if this box is checked). When unchecked, the file is opened in the full text input file view.
Use syntax highlighting, when checked, adds color to the text in the full input file view to help denote certain parts of the file. When unchecked, the text is all black.
Show line numbers, if checked, shows the line numbers on the full text input file view. When unchecked, they are not.
Highlight current line highlights the line where your cursor lies. If this box is unchecked, the line is not highlighted.
Show post-processed file shows the post-processed .in file in a separate tab. This file shows the full text input file after it has gone through any Python calculations. When this option is unchecked, this file is not visible.
Word wrap makes the text of the input file wrap at the end of the line. When this box is unchecked, the text will not be wrapped.
See Fig. 33.
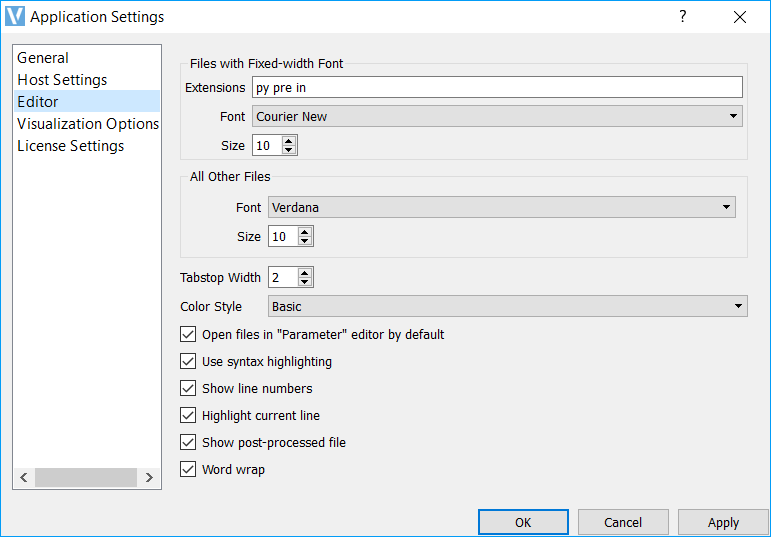
Fig. 33 Editor Menu
Visualization Options
The visualization options tab allows the user control over default settings of the Visualize window in VSimComposer.
Manual font sizing allows you to control the size of the fonts of plots.
Enable VisIt context menu enables you to right-click on a visualization and open VisIt itself, where the user can access every function and feature of VisIt. It also enables the embedded point and line tools in VisIt as well as some of the generic view controls.
Try harder to load cycles and times determines how aggressive VisIt is when opening dataset. When this option is checked (ON), VisIt will open every single dataset looking for time and cycle information. When this option is unchecked (OFF), VisIt will only look at the first file in a series. The advantage of having this option OFF is that datasets with lots of files are opened more quickly and with less memory usage. The disadvantage of having this option OFF is that the dump slider will not display any time or cycle information– only the dump number.
Default ColorTable is the default color table used for plotting color plots.
See Fig. 34.
For more information on VisIt, please see: https://wci.llnl.gov/codes/visit/ and http://www.visitusers.org/index.php?title=VisIt_Wiki.
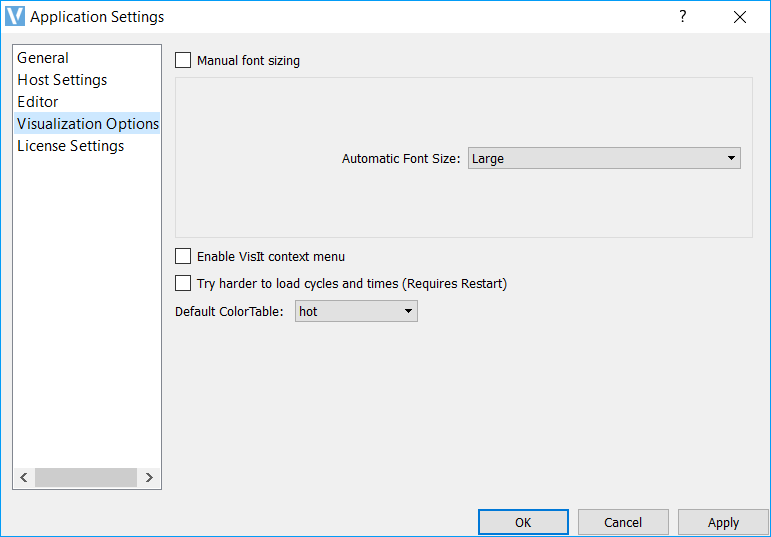
Fig. 34 Visualization Menu
License Settings
It is possible to review your license activation file and install a new license activation file if an upgrade or additional packages are purchased. To see the contents of the license activation file, click on the Details button. To install a new license activation file, click on the Add button. In the resulting file window, navigate to the previously-saved license file and then click the Open button. At this point, VSimComposer should import the license activation file and it will appear as the active license in the list of license files. See Fig. 35.
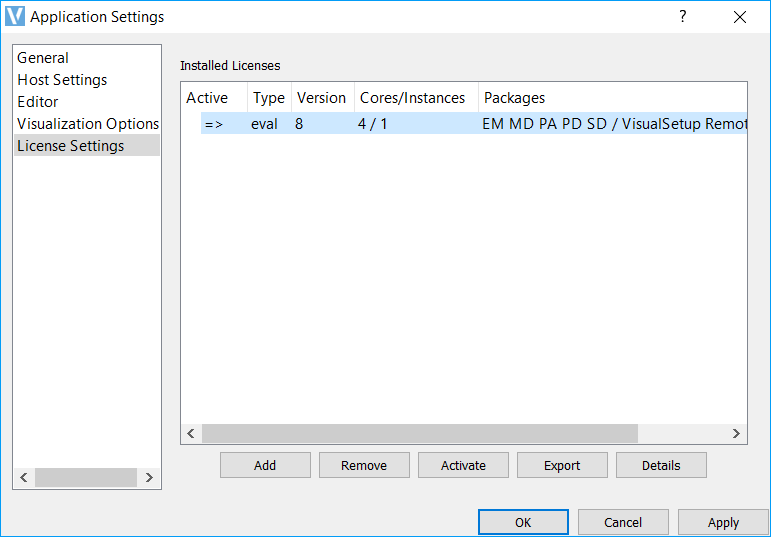
Fig. 35 License Activation File Menu